How to Clean Epson Printer Heads at Home: A Complete DIY Guide
Is your Epson printer acting up with faded or streaky prints? You’re not alone. Many users struggle with clogged nozzles, especially if the printer hasn’t been used for a while. The good news? You can clean Epson printer heads at home without needing professional help. In this guide, we’ll walk you through everything you need to know about maintaining your printer, saving money, and avoiding future print quality issues.
Why You Need to Clean Epson Printer Heads
Epson printers use a piezoelectric print head, which is incredibly precise but sensitive to ink drying or dust buildup. Over time, ink residue can clog the nozzles, leading to:
- Patchy or blurry printouts
- Faded colors
- Missing lines in text or images
- Complete lack of ink despite full cartridges
To fix these issues, cleaning Epson printer heads at home is a reliable and cost-effective solution.
Tools You’ll Need to Clean Epson Printer Heads at Home
Before jumping in, gather the following items:
- A lint-free cloth or paper towels
- Distilled water or a cleaning solution (specific for inkjet printers)
- A syringe or dropper
- Rubber gloves (optional, but helpful)
- Patience and a steady hand
Method 1: Use Epson’s Built-In Head Cleaning Utility
The easiest way to start is by using your printer’s built-in cleaning function. Follow these steps:
Step-by-Step Instructions:
- Turn on your Epson printer and make sure it has paper loaded.
- On your computer, go to:
- Windows: Control Panel > Devices and Printers > Right-click on your Epson printer > Printing Preferences > Maintenance tab.
- Mac: System Preferences > Printers & Scanners > Select your printer > Options & Supplies > Utility.
- Select “Head Cleaning” and run the process.
- After the cycle completes, run a “Nozzle Check” to verify if print quality has improved.
Repeat the cleaning cycle up to 3 times if necessary. Avoid doing it too often, as it can waste ink.
🔗 External Tip: Epson Official Support provides tools and drivers for every model.
Method 2: Manual Epson Printhead Cleaning (Without Removing)
If the built-in utility doesn’t work, it’s time to manually clean Epson printer heads at home.
Step-by-Step Manual Cleaning:
- Turn off and unplug the printer.
- Open the cover and let the print head rest in the center.
- Place a folded paper towel under the printhead to catch ink and residue.
- Use a syringe or dropper to apply a few drops of distilled water or Epson-safe cleaning fluid on the nozzles.
- Let it sit for 15-30 minutes to loosen any dried ink.
- Gently move the printhead side to side over the paper towel.
- Repeat the process if necessary.
Once done, run the nozzle check again. This method can unclog Epson printer heads without disassembling the machine.
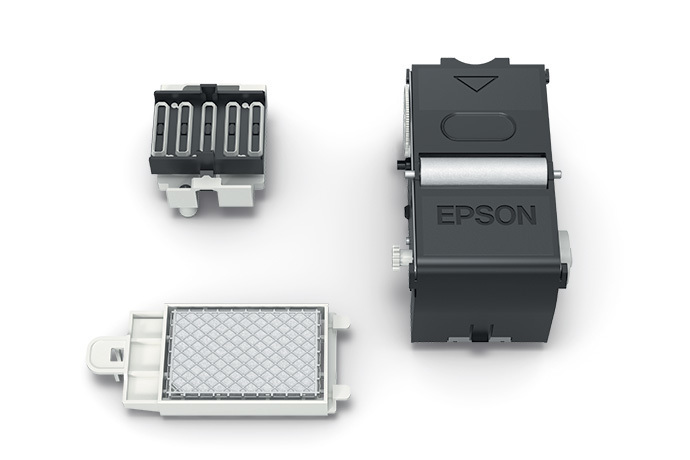
Method 3: Deep Clean Epson Printer Heads by Removing the Printhead
⚠️ Warning: Only attempt this method if you’re comfortable handling printer parts. Incorrect handling may damage the device or void warranties.
How to Do It:
- Turn off and unplug the printer.
- Remove the ink cartridges carefully.
- Unscrew the printhead mechanism and lift it out.
- Soak the printhead in a shallow dish of warm distilled water or cleaning solution for a few hours.
- Gently blot with a lint-free cloth.
- Allow it to dry completely before reinstalling.
This deep clean Epson printer technique is often the most effective if the clog is severe.
Preventative Maintenance Tips for Epson Printers
Maintaining your printer is key to avoiding clogs. Here’s how you can prevent Epson printer head issues:
- Print at least once a week to keep ink flowing.
- Keep your printer in a dust-free, cool environment.
- Use genuine Epson ink cartridges for better compatibility.
- Replace cartridges before they are completely empty.
- Run Epson’s utility tools monthly as part of your Epson maintenance routine.
When to Use an Epson Head Cleaning Kit
For persistent clogs, an Epson head cleaning kit might be necessary. These kits often come with:
- Cleaning fluid
- Syringe and tube attachment
- Instructions specific to your printer model
They’re available online and can save you from the hassle of replacing the entire printhead or printer.
💡 Pro Tip: Make sure the cleaning kit is compatible with your Epson model.
Signs Your Printhead Needs Cleaning
Wondering whether it’s time for a cleaning? Look out for these signs:
- Horizontal lines across prints
- Entire colors missing
- Black text printing in gray or faded tones
- Incomplete printouts
- The printer is not detecting ink despite full cartridges
If you notice any of these, it’s time to clean Epson printer heads at home.
FAQs About Cleaning Epson Printer Heads
Q1. How often should I clean my Epson printer heads?
You should clean your Epson printhead whenever print quality drops. As a preventative measure, do a nozzle check every month.
Q2. Can I use alcohol to clean Epson heads?
No. Isopropyl alcohol may damage the delicate nozzles. Always use distilled water or a professional-grade cleaning solution.
Q3. What if cleaning doesn’t fix the issue?
If all cleaning methods fail, your printhead may be permanently clogged or damaged. In that case, contact Epson customer support or consider printhead replacement.
Final Thoughts: Don’t Toss Your Printer Yet!
Epson printers are built to last, but like all machines, they need care. By learning to clean Epson printer heads at home, you can:
- Restore print quality
- Extend your printer’s lifespan
- Avoid expensive repair bills
- Keep your workflow running smoothly
Don’t wait until your prints are unreadable. Regular maintenance, quick cleanups, and using the right materials will keep your Epson printer performing like new.